


These guides should not be reposted off the website. If you translate it, please link back.
I also want to give a big thank you to everyone who donated recently as this guide wouldn’t be happening otherwise– I wouldn’t have had enough AP to play the new episode otherwise.
– Negative result for LOM
/ Neutral result for LOM
+ Positive result for LOM
Any without one of the symbols above means I don’t know. Some dialogue may be translated from my French account.
Action Points used: 1,800-2,100+. Due to how personality can change prices, it’s a bit harder to calculate.
Illustrations: 5 – You can only receive 1 Illustration per playthrough. Do your best to hit every positive (or at least more than half) for your love interest as “having enough” LoM this episode is apparently determined by how many positive answers you picked and not your overall LoM with the LI.
Expenses: $140 per Outfit (It is 50% off for your first playthrough though, so one will just be $70 for you)
Special Scene Cost: 120 Gems per special scene.
Outfits: 2. Fit for Speed (Black/Red/White Jacket, long black pants, crop top) is for Amanda and Jason. Color Blur (Colorful jacket, black shorts, ripped tights) is for Devon, Thomas, and Roy.

Taki Outfit: Vroom Vroom
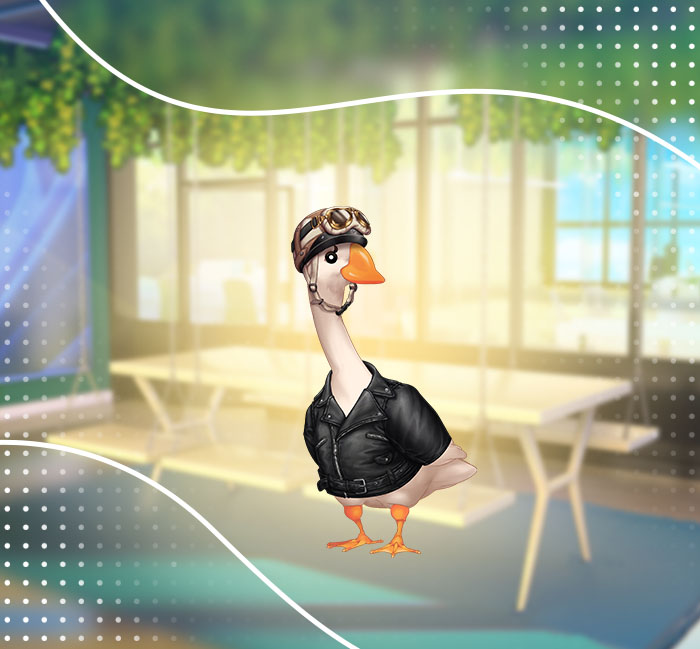
You can find Uncle Archibald inside the Cosy Bear Cafe after splitting up again. You must pick “I sincerely hope you are right…” to get the outfit.
You can find my playthrough of Episode 10 over here!
The episode starts off in the office where you’re finishing up on a project for City Hall.
• [Sweet] He’ll tell you that it’s not because of luck. -5 with Brune
• [Energetic] Aren’t we all lucky to work here…? /
• [Rebel] And not only for the hours, actually. +5 with Brune
Alas, Thomas is still missing even after eating lunch so with the meeting at City Hall pushed back, it’s time to go look for Thomas. You decide to break into groups.
Brune: Okay. I’ll go with Elenda.
• I’ll go with Brune and Elenda. / ⬅ TOWARDS JASON’S ILLUSTRATION
• Devon, do you want to partner up? / ⬅ TOWARDS DEVON’S ILLUSTRATION
• Amanda, do you want to come with me? / ⬅ TOWARDS AMANDA’S ILLUSTRATION
• Roy and I can make a second group. / ⬅ TOWARDS ROY’S ILLUSTRATION
You can pick any of the above for Thomas’ illustration, though if you pick one of the Love Interests, there will be an extra dialogue option to pick at the end that also causes whoever you picked to lose 10 LoM.
Regardless of who you are with, you’ll head to Main Street and after more dialogue, make your way to the Alley and Cosy Bear Cafe where a crowd has formed.
After more discussion, whoever you’re with (or Brune if with her and Elenda) calls up the others to meet and discuss. While you wait for them to get there, you get a 10-minute timer.
Elenda: This is horrible, not knowing!
• [Rebel] Calm down, it won’t help to panic. /
• [Energetic] You’ll see, there’s probably nothing wrong. +5 with Elenda
• [Sweet] Yeah, it’s hard. But I’m sure that everything will be alright. +10 with Elenda
Brune: I was just saying…
• [Rebel] Actually, it’s not a bad idea. +5 with Brune
• [Energetic] Maybe you shouldn’t have said anything at all… -5 with Brune
• [Sweet] Please, let’s not start fighting. /
After more discussion, you’ll split back up. Once you can move again though, you can find Uncle Archibald for a new outfit for Taki if you want! Simply head back to the Cosy Bear Cafe and head inside. (As always, you may need to go back and forth a bit)
• I want to believe you, but then where to look…?
• Honestly, I’m starting to lose hope…
• I sincerely hope you are right… ⬅ CORRECT ANSWER FOR TAKI’S OUTFIT
With that done, where you go next is up to you. You’ll still go everywhere, just the order will vary.
If you want to see Thomas’ Mom: Enter the Park
If you want to head to the Police Station: Go to Sweet Amoris
If you want to go to the Hospital: Head to the Campus Entrance.
If you’re trying to get Jason’s illustration, after picking two of these, you must head back towards the Cafe before going to the third location. Similarly, you can still meet with Uncle Archibald up until you visit the last location.
If you decide to go to Thomas’ Mom’s house:
Enter the Park to head to Thomas’ Childhood home which hasn’t changed much since HSL. It’s here that you’ll get your outfit choice.
Fit for Speed (Black/Red/White Jacket, long black pants, crop top) is for Amanda and Jason. Color Blur (Colorful jacket, black shorts, ripped tights) is for Devon, Thomas, and Roy.
You’ll then end up talking to Thomas’ mother, Isabelle.
• [Rebel] Calm down, there’s no point in panicking yet. -5
• [Sweet] It’s normal to feel worried… But we will find him. /
• [Energetic] Do you have any idea where he could be? +5
If you decide to go to the Police Station
Make your way to Sweet Amoris and once you get there, you’ll see more familiar faces.
Eric: It’s always best to report a disappearance as soon as possible.
• [Rebel] You won’t look for him if we don’t? /
• [Sweet] But he didn’t really disappear… /
• [Energetic] Alright, let’s do it, then. /
If you decide to go to the Cafe
This is OPTIONAL unless you’re planning to go for Jason. But it is some extra dialogue if you like extra story. You can only get the dialogue at the Cafe if you’ve only gone to 2/3 places.
• (I’ll wait to see the others before I decide.) ⬅ TOWARDS EVERYONE ELSE’S ILLUSTRATIONS
• (Whatever. I’ll do it.) ⬅ TOWARDS JASON’S ILLUSTRATION
• (I prefer not to take the risk.) ⬅ TOWARDS EVERYONE ELSE’S ILLUSTRATIONS
• Sorry, I don’t have time for jokes today. +5 with Jason
• Let me say what I have to say before you start celebrating. -5 with Jason
• Just… Listen to me, please. /
If you decide to go to the Hospital
Head over to the Campus Entrance to get to the hospital. You’ll get another timer here, this time for 15 minutes.
• (Can’t they go any faster…?!) /
• (I looked around for a clue.) /
• (I did my best not to think.) /
| If you stopped by to see Isabelle already
• [Rebel] We won’t tell anyone, we promise… +5 with Brune, -5 with Elenda, Amanda, Devon, and Roy |
If you haven’t seen Isabelle yet
• [Rebel] We won’t tell anyone, we promise… +5 with Brune, -5 with Elenda, Amanda, Devon, and Roy |
While I list all options, only who you partnered with is affected.
You will only get the information from the hospital if you visited Isabelle first and you pick the Sweet option.
At this point, you’ll meet back up outside the Office. Jason will also end up showing up if you called for his help.
Brune: It’s probably no use…
• [Rebel] The “probably” is important: we can’t be sure. +5 with Brune
• [Sweet] I know. But I don’t want to go home. I… /
• [Energetic] It’s also no use doing nothing! -5 with Brune
And then lo and behold, Thomas shows up… with a new motorcycle.
• [Energetic] Thomas, you’re going to have to concentrate… +5 with Devon and Roy, +10 with Elenda, / with everyone else
• [Sweet] It’s cool, but… +5 with Thomas and Elenda, -5 with Amanda and Brune, / with everyone else
• [Rebel] Who cares?! That’s not the question!!! +5 with Amanda, -5 with Thomas, Devon, and Roy, / with everyone else
• (I remained frozen, unable to understand what emotion I was feeling.) / ⬅ TOWARDS THOMAS’ ILLUSTRATION
• (I looked at my friends in turn, waiting for a reaction…) / ⬅ TOWARDS DEVON’S AND ROY’S ILLUSTRATIONS
• (I opened my mouth to say something, anything…) / ⬅ TOWARDS AMANDA’S ILLUSTRATION
You can pick any of these if you’re going for Jason. Supposedly picking either non-Thomas option works for everyone else, but I still have to test things out…
If you paired up with Amanda:
• (I walked past her, heading straight towards Thomas…) -10 with Amanda ⬅ TOWARDS THOMAS’ ILLUSTRATION
• (Without thinking, without even waiting for her to turn towards me, I took Amanda in my arms.) +5 with Amanda ⬅ TOWARDS AMANDA’S ILLUSTRATION
• (So was I… I was frozen in place.)
If you paired up with Roy:
• (I snuggled up against him, his arms wrapped around my shoulders.) +5 with Roy ⬅ TOWARDS ROY’S ILLUSTRATION
• (He couldn’t finish taking me in his arms, I naturally moved towards Thomas.) -10 with Roy ⬅ TOWARDS THOMAS’ ILLUSTRATION
• (I froze…)
If you paired up with Devon:
• (And I naturally moved towards him too.) +5 with Devon ⬅ TOWARDS DEVON’S ILLUSTRATION
• (But I was already moving towards Thomas.) -10 with Devon ⬅ TOWARDS THOMAS’ ILLUSTRATION
• (On my end, my body refused to move…)
If you called Jason for help:
Jason will run off. Candy will chase after him towards Main Street.
• (I yelled his name so that he’d wait for me.) /
• (I quickened my pace to catch up to him.) / ⬅ TOWARDS JASON’S ILLUSTRATION
• (I followed him discreetly, naturally.) /
Jason: I’d be curious to hear how you’d explain things…
• [Rebel] I’d just say that I’m arresting you. +5
• [Sweet] The explanation is quite simple! /
• [Energetic] I can hear your heart beating. -5
After dialogue and the illustration, you’ll head back to everyone else, and it’ll pick up from deciding to go with everyone to get drinks to celebrate.
And that’s the end of the episode. You’ll also unlock a new “minigame” for your desk: Catalogs.